Create quiz in moodle
Step 1: Turn Editing On
Go to your Moodle course.
Click “Turn editing on” (top-right corner).
Navigate to the topic or section where you want the quiz.
Step 2: Add a Quiz Activity
Click “Add an activity or resource.”
Choose “Quiz” from the list.
Click “Add.”
Step 3: Configure Quiz Settings
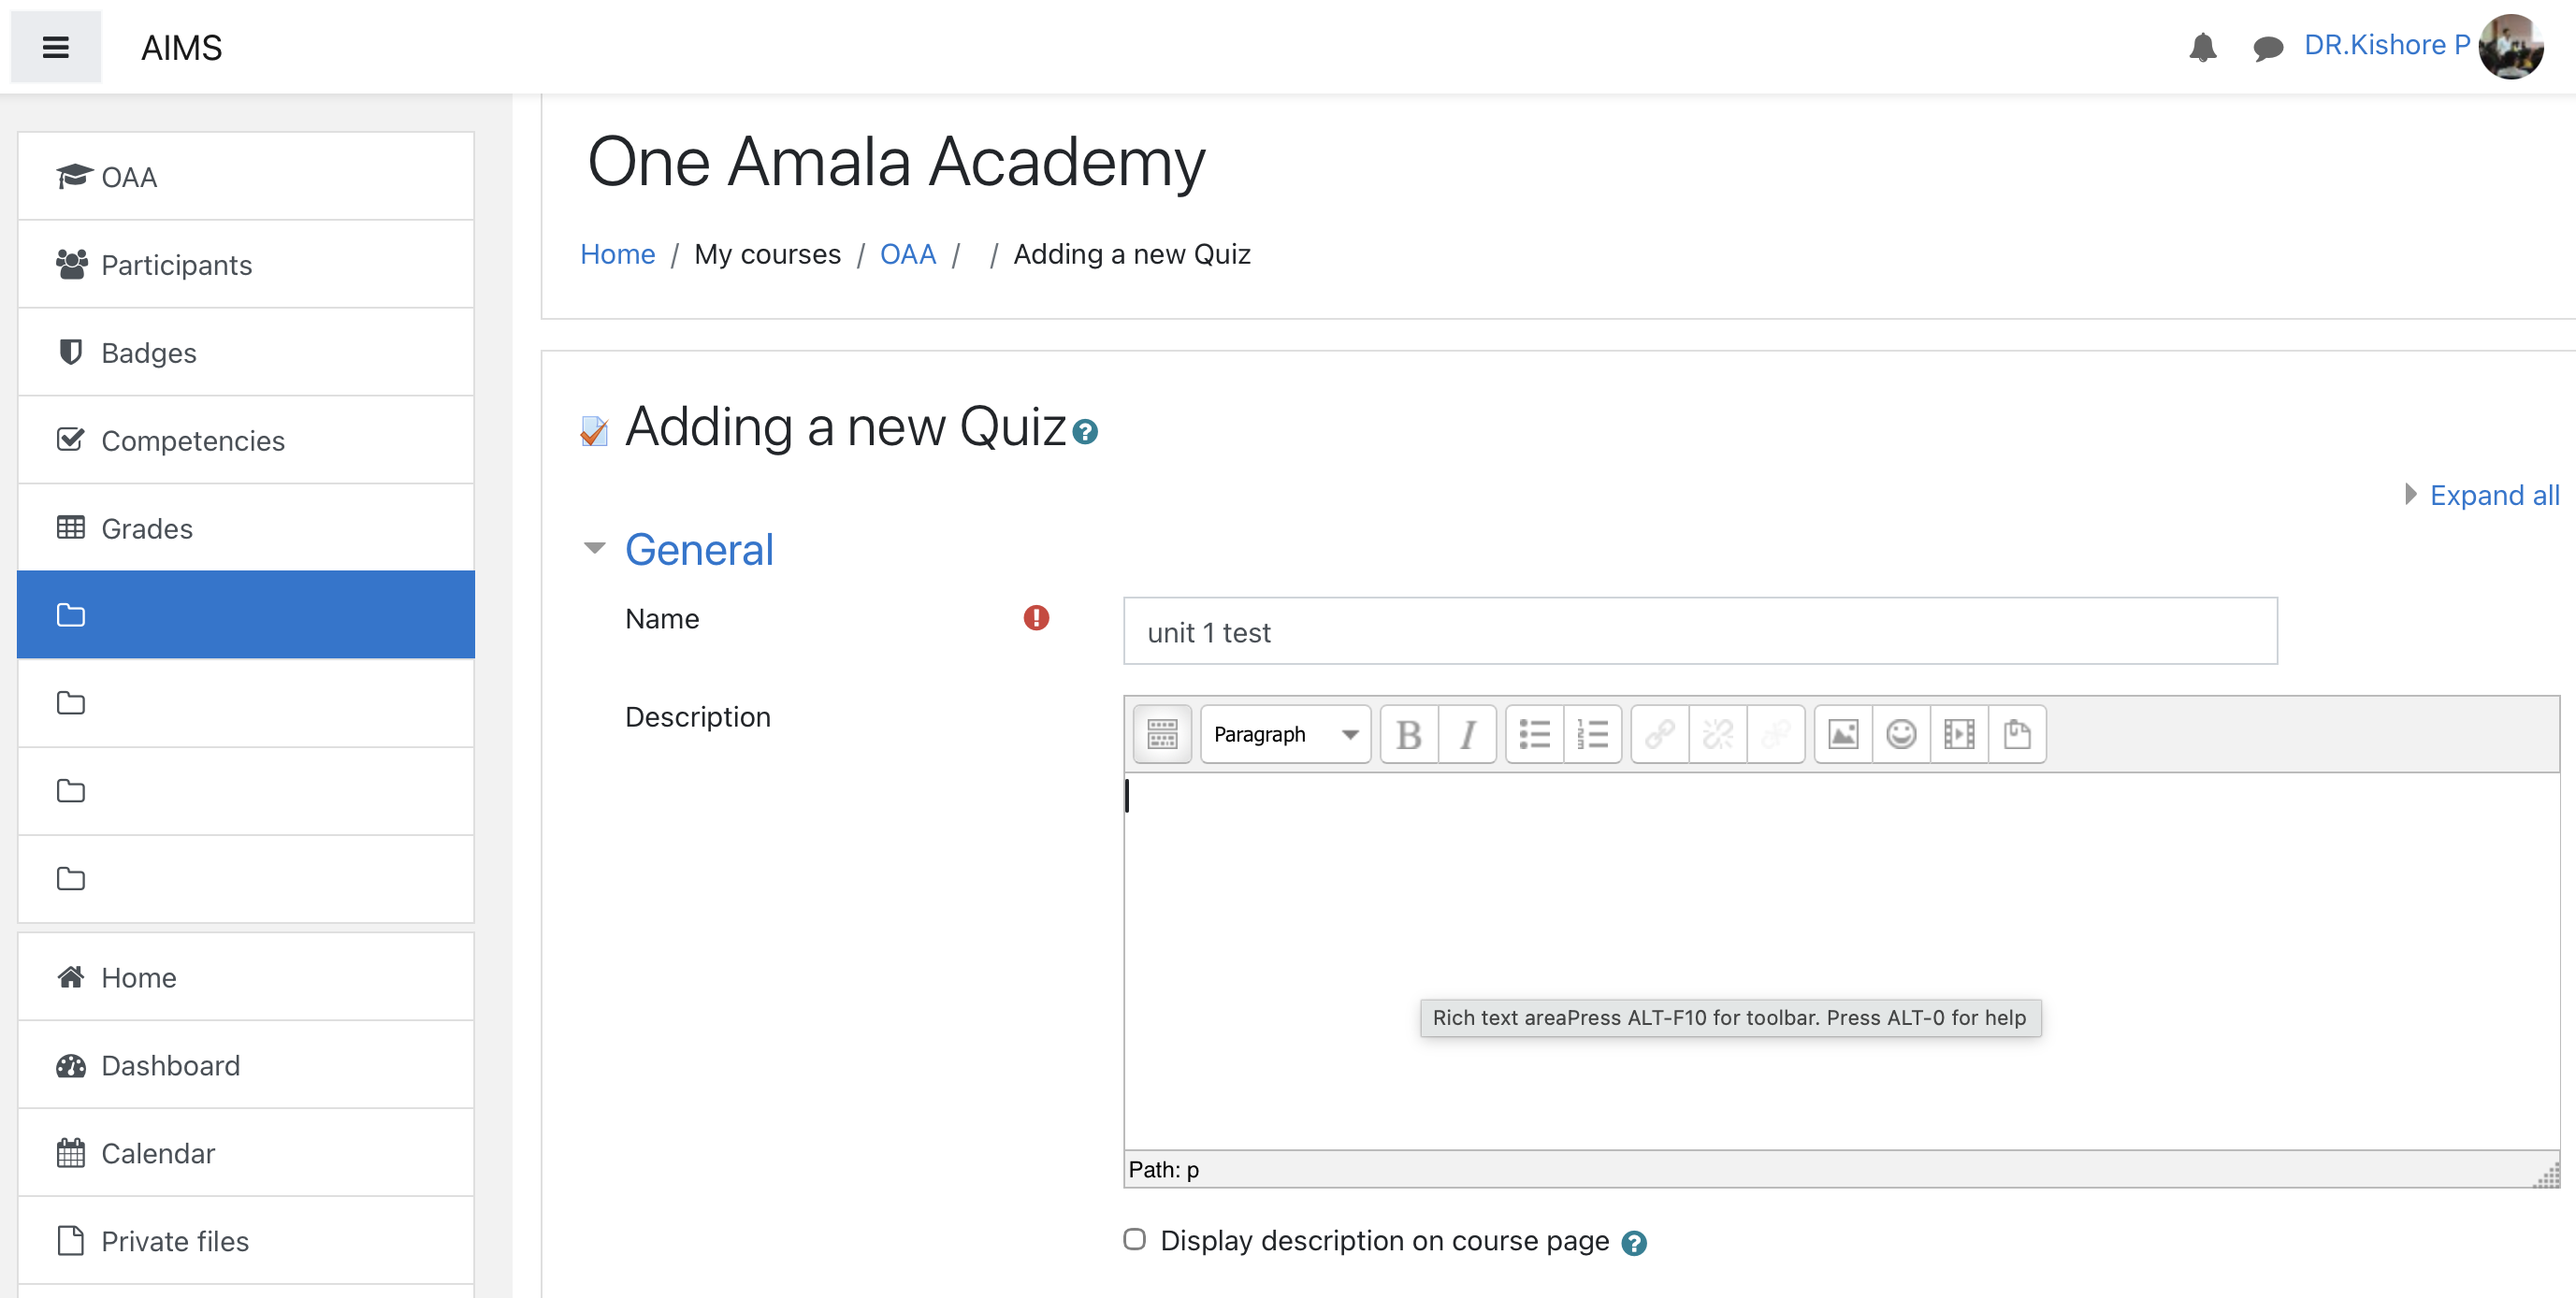
General
Name: Give your quiz a clear title (e.g., Unit 1 Test).
Description: Explain what the quiz covers or any special instructions (optional).
Timing
Open the quiz / Close the quiz: Set start and end date/time.
Time limit: Set how long students have to finish.
When time expires: Choose what happens (e.g., auto-submit).
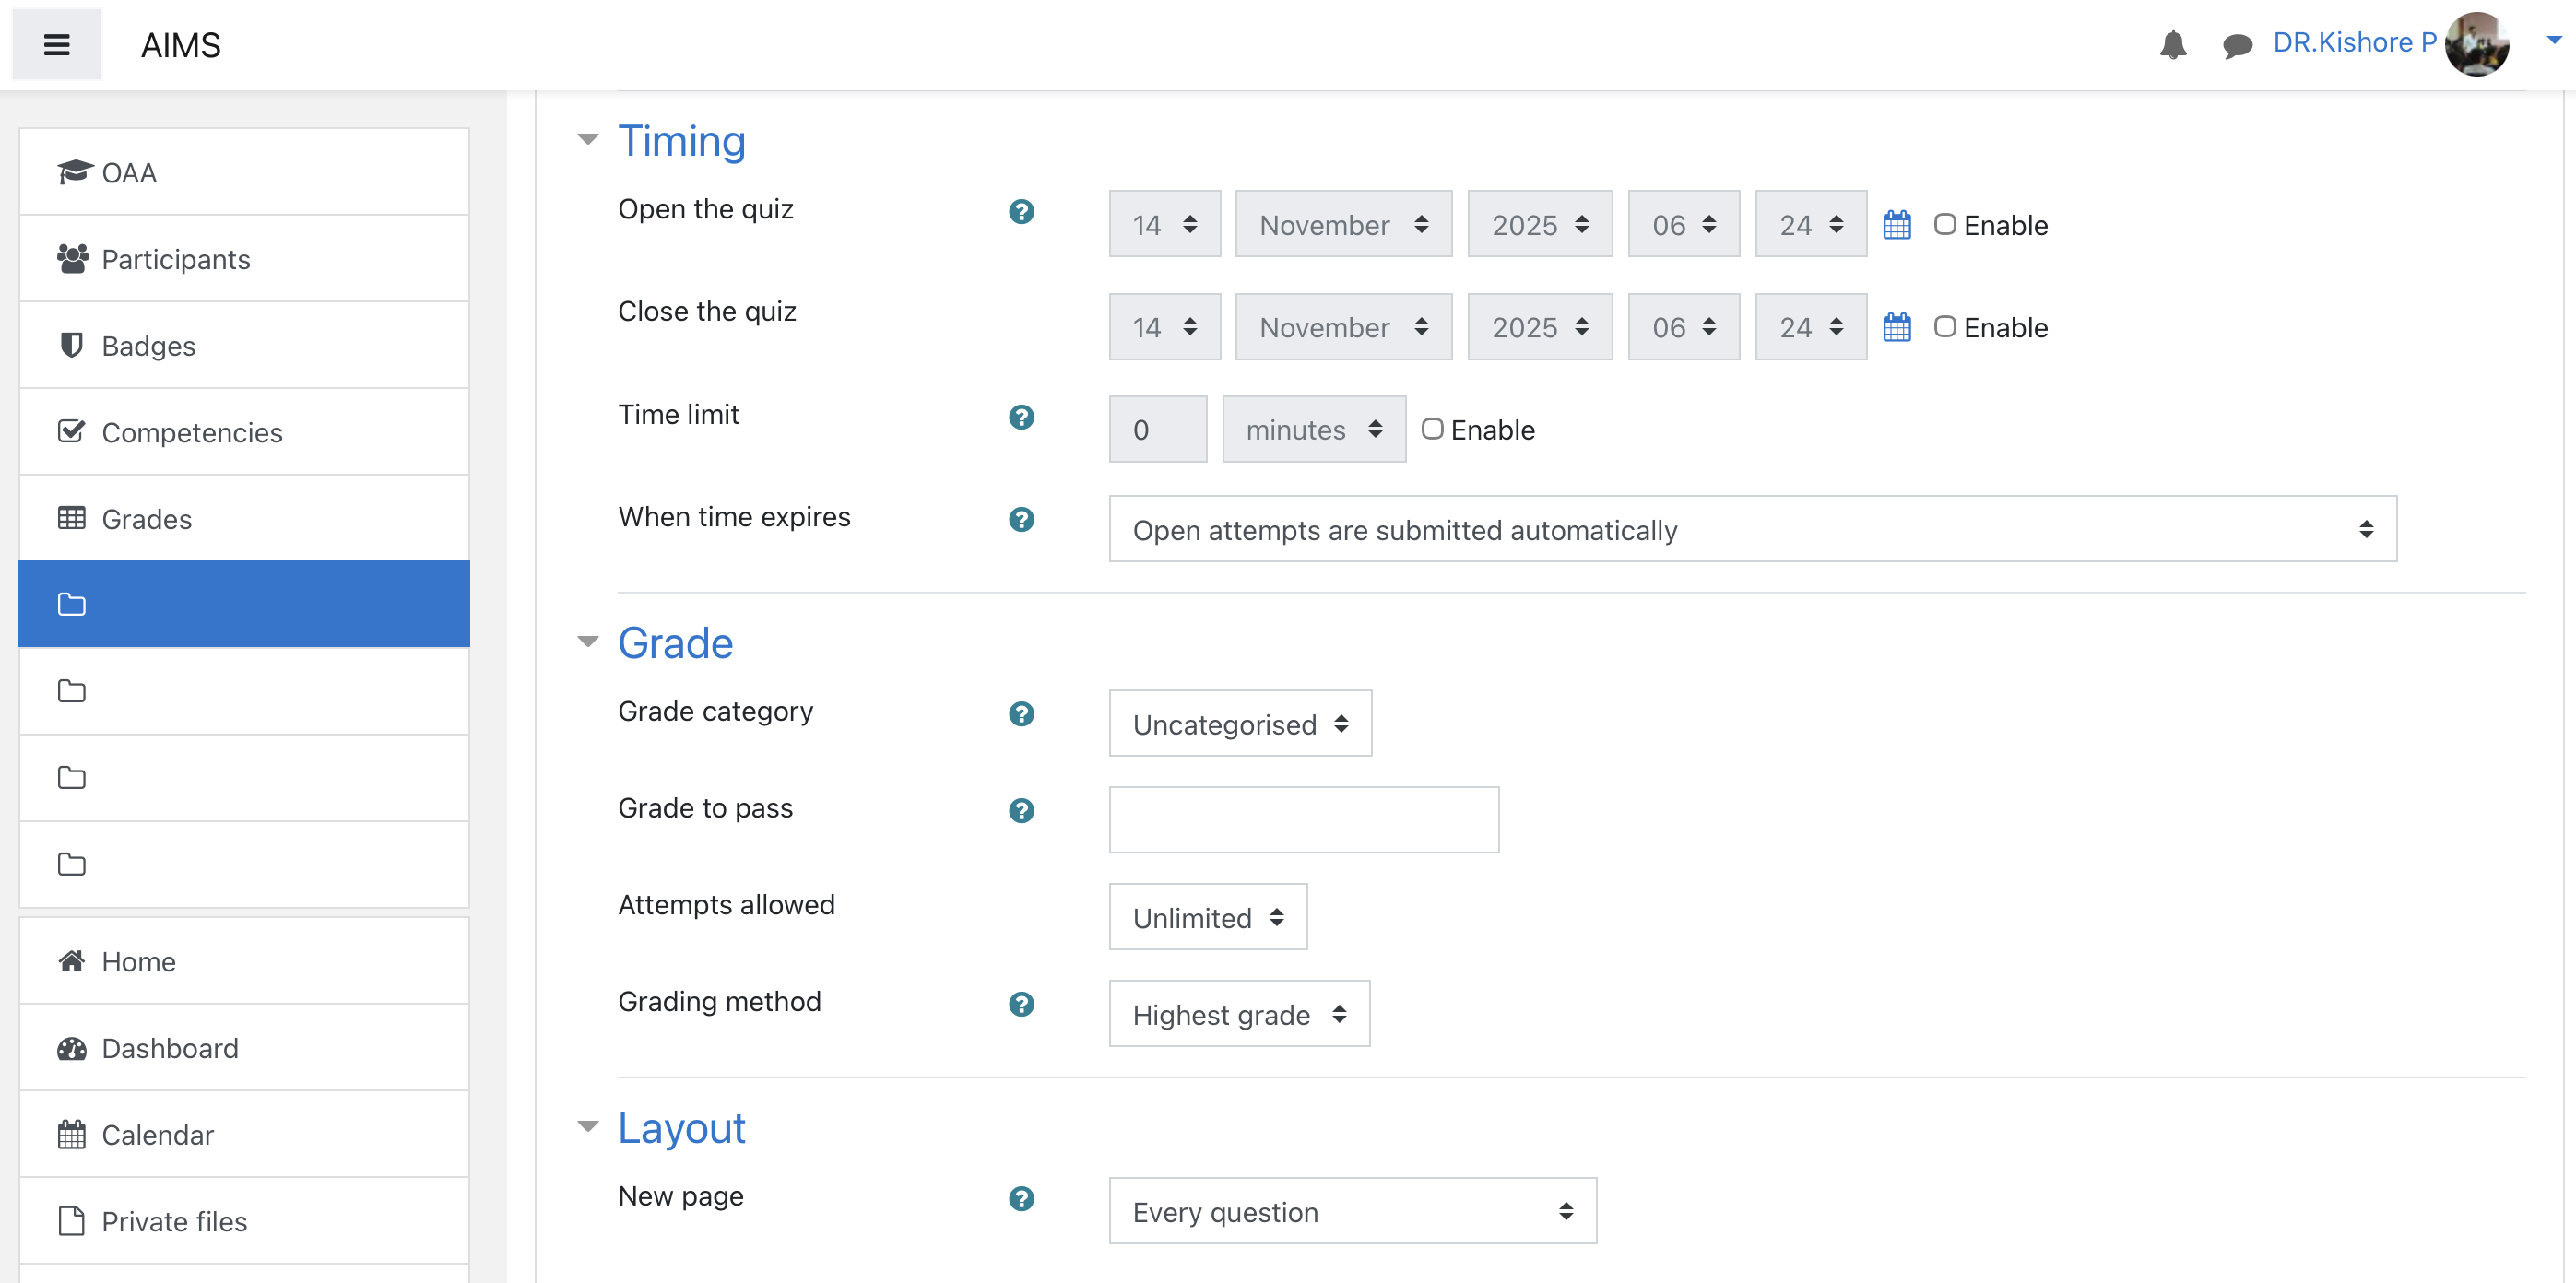
Grade
Grade to pass: Optional threshold (e.g., 50%).
Attempts allowed: 1 (for exams) or multiple (for practice).
Layout
New page: Choose how many questions per page.
Navigation method: Free (default) or Sequential.
Question behavior
Shuffle within questions:
Randomize options (good for MCQs).
How questions behave: e.g., Deferred feedback, Immediate feedback.
Review options
Decide what students can see:
During attempt: Keep unchecked for exams.
Immediately after: Show marks or feedback if desired.
Later: Reveal answers after quiz closes.
Appearance
- Optionally show user pictures, decimal places, etc.
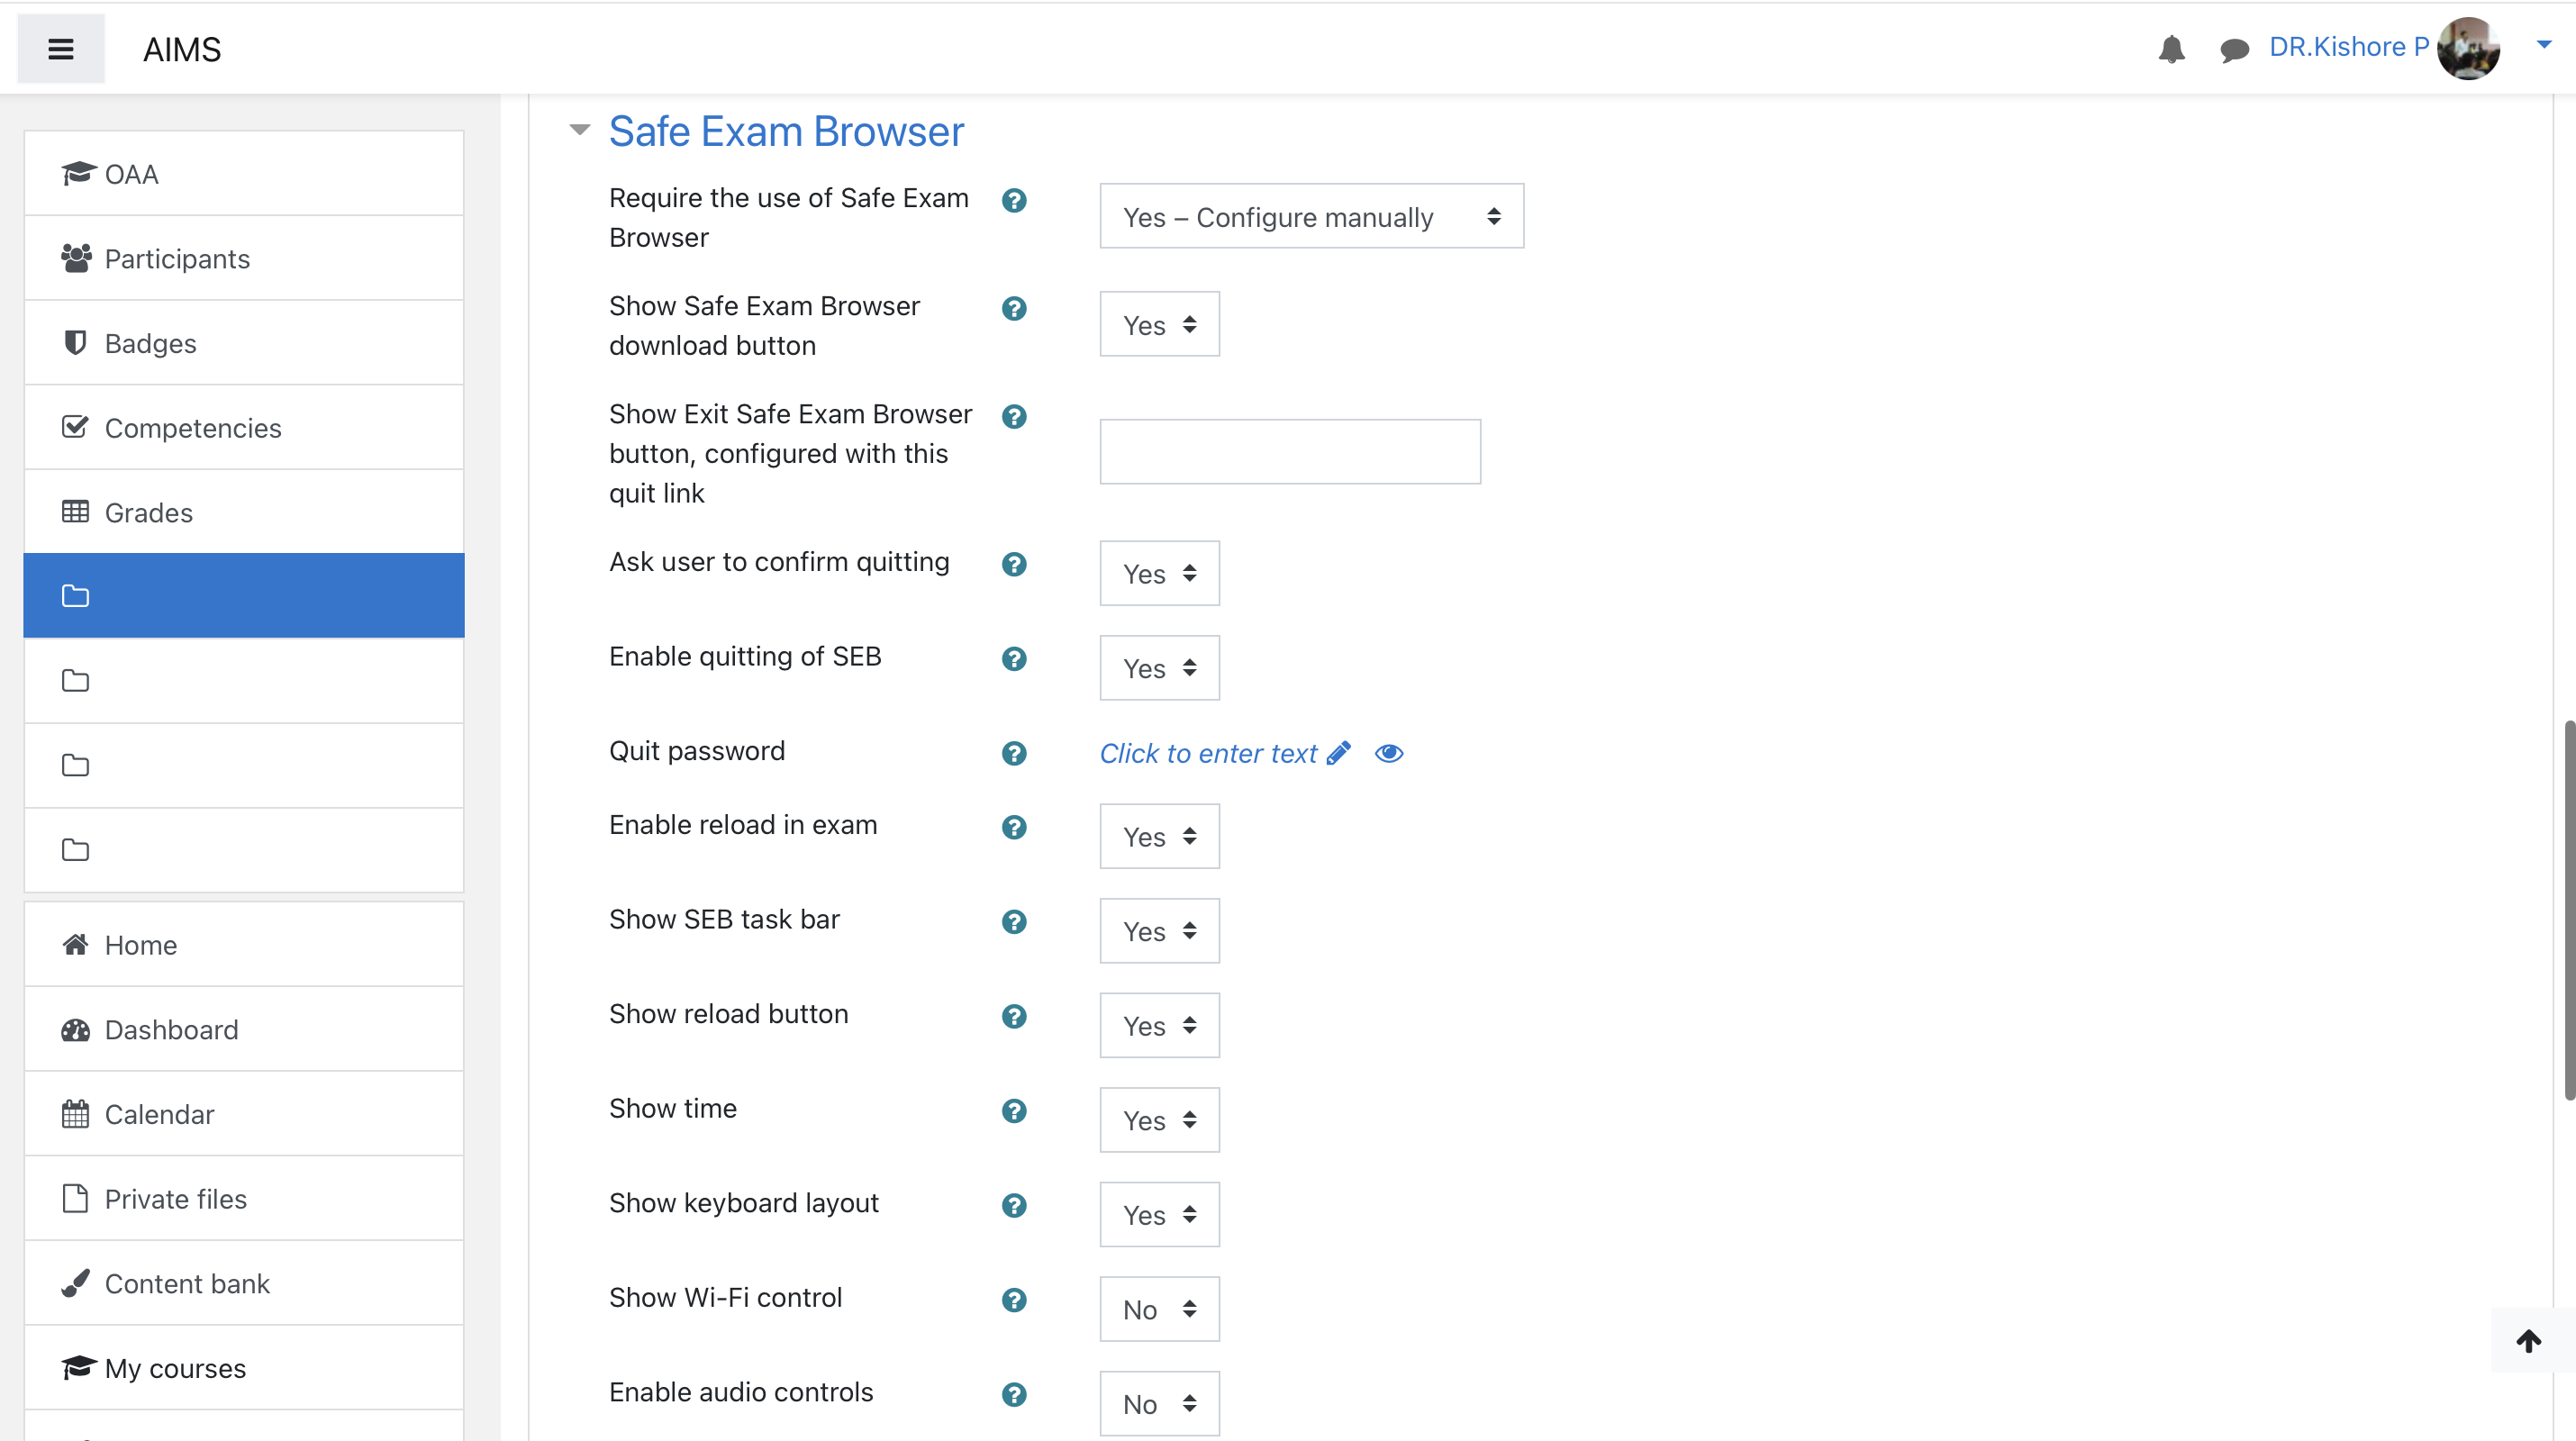
Safe exam browser
Step 4: Add Questions
Click “Edit quiz.”
Click “Add → a new question.”
Manual method
Choose a question type, such as:
Multiple Choice
True/False
Short Answer
Matching
Essay
Numerical
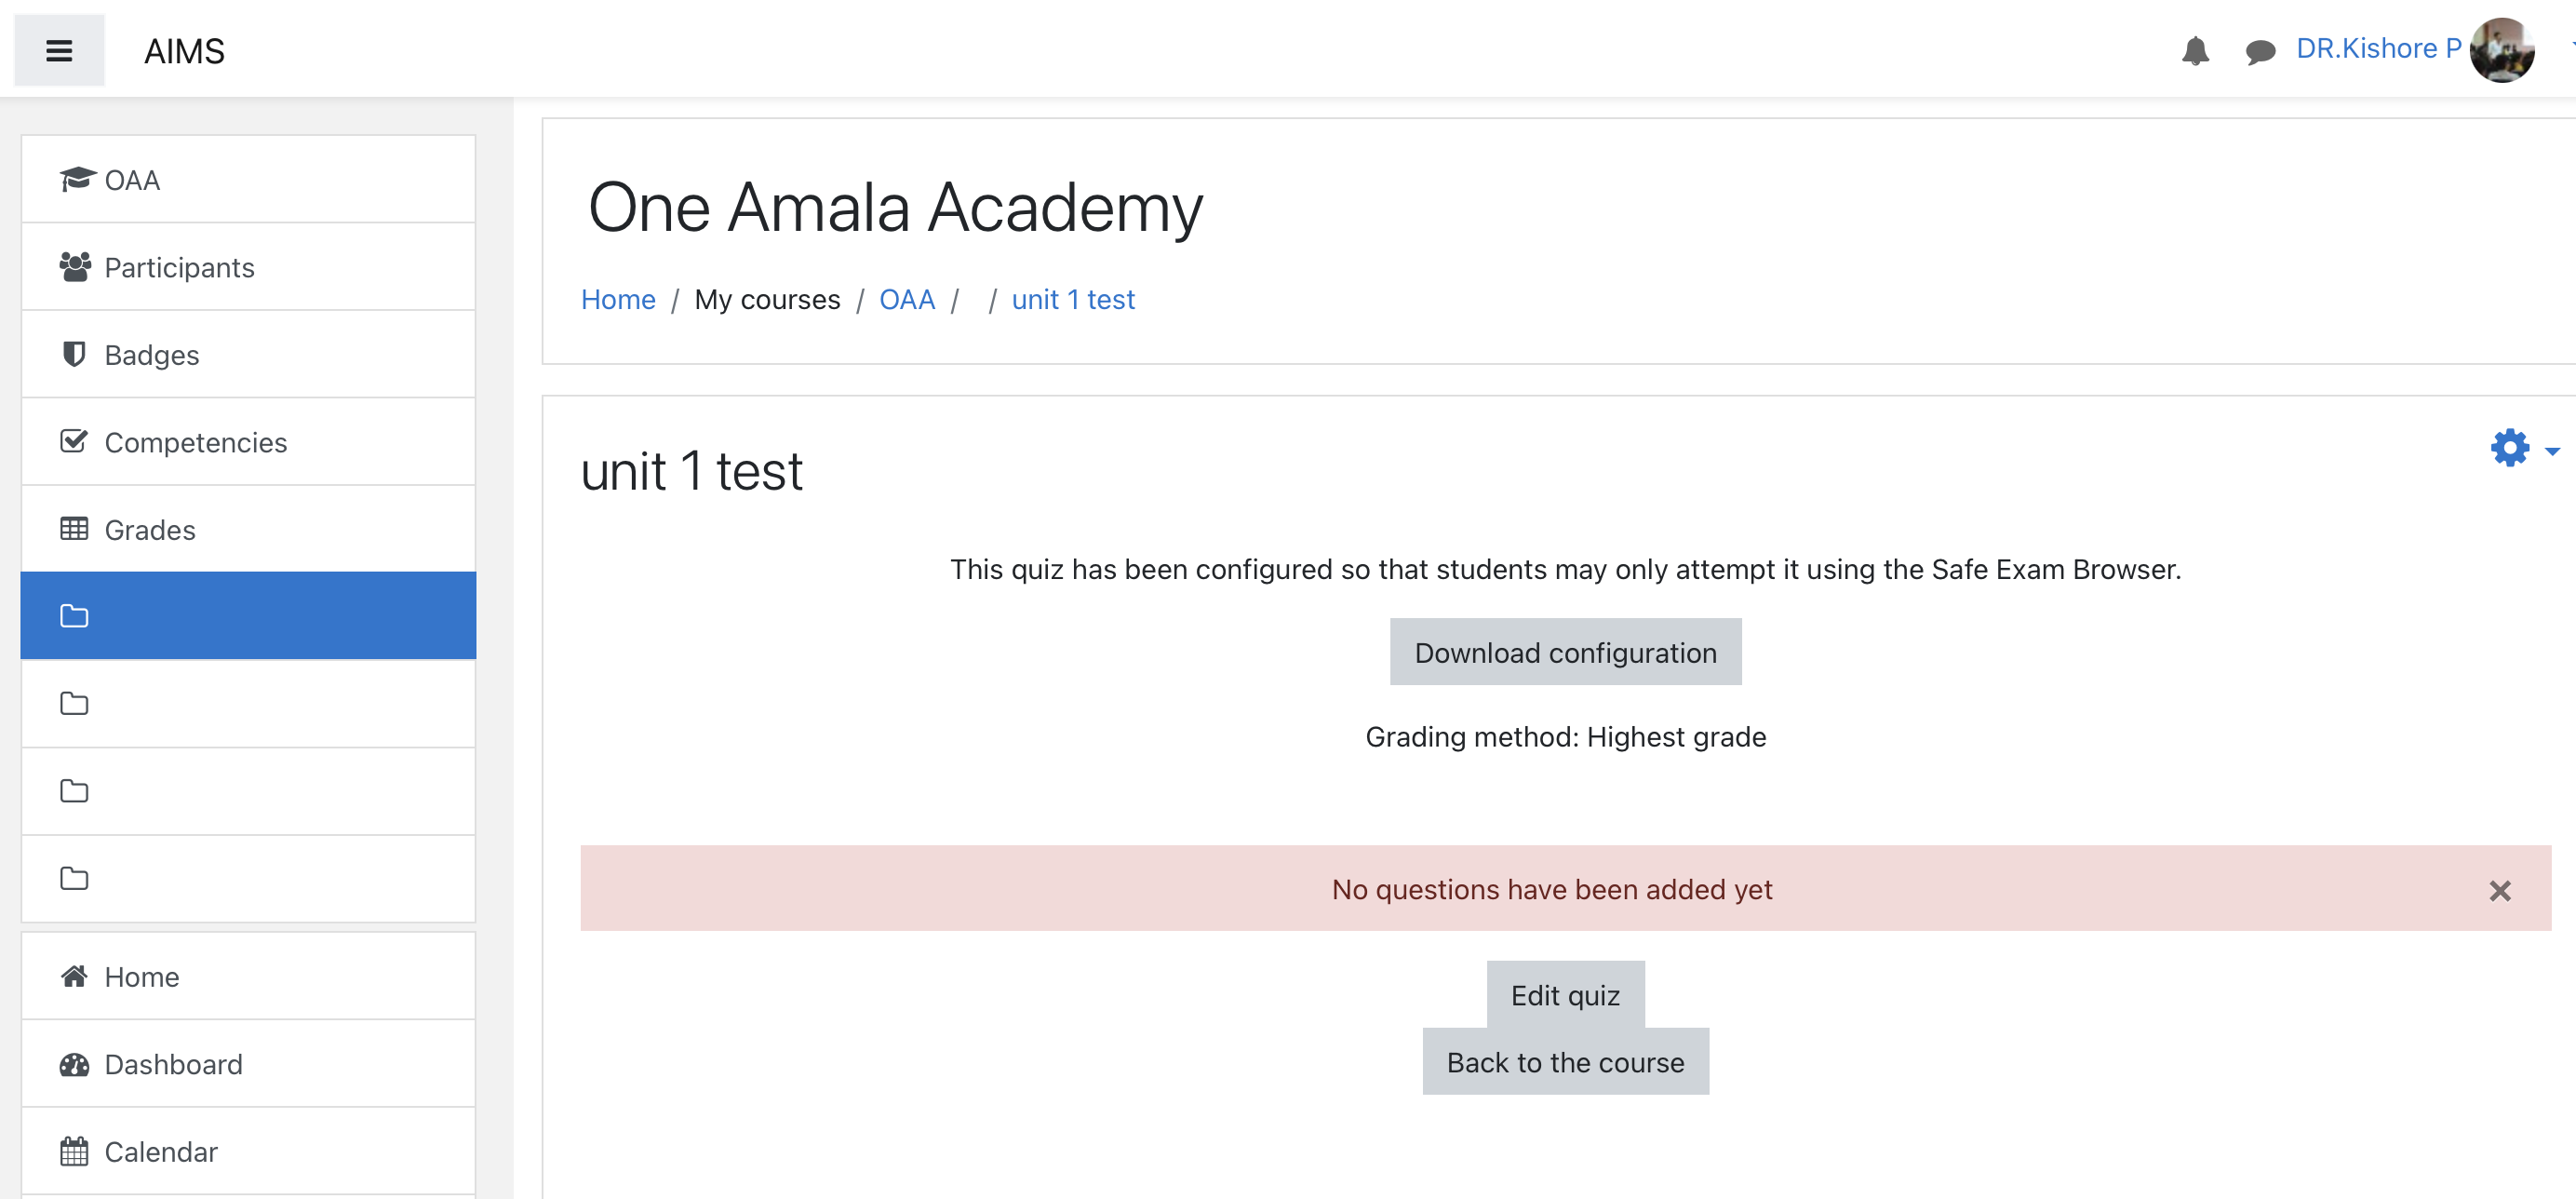
Add questions
Fill in:
Question name
Question text
Default mark
Options (answers, feedback, etc.)
Click Save changes.
Repeat to add more questions.
Question bank
Use question bank to reuse or share questions across courses.
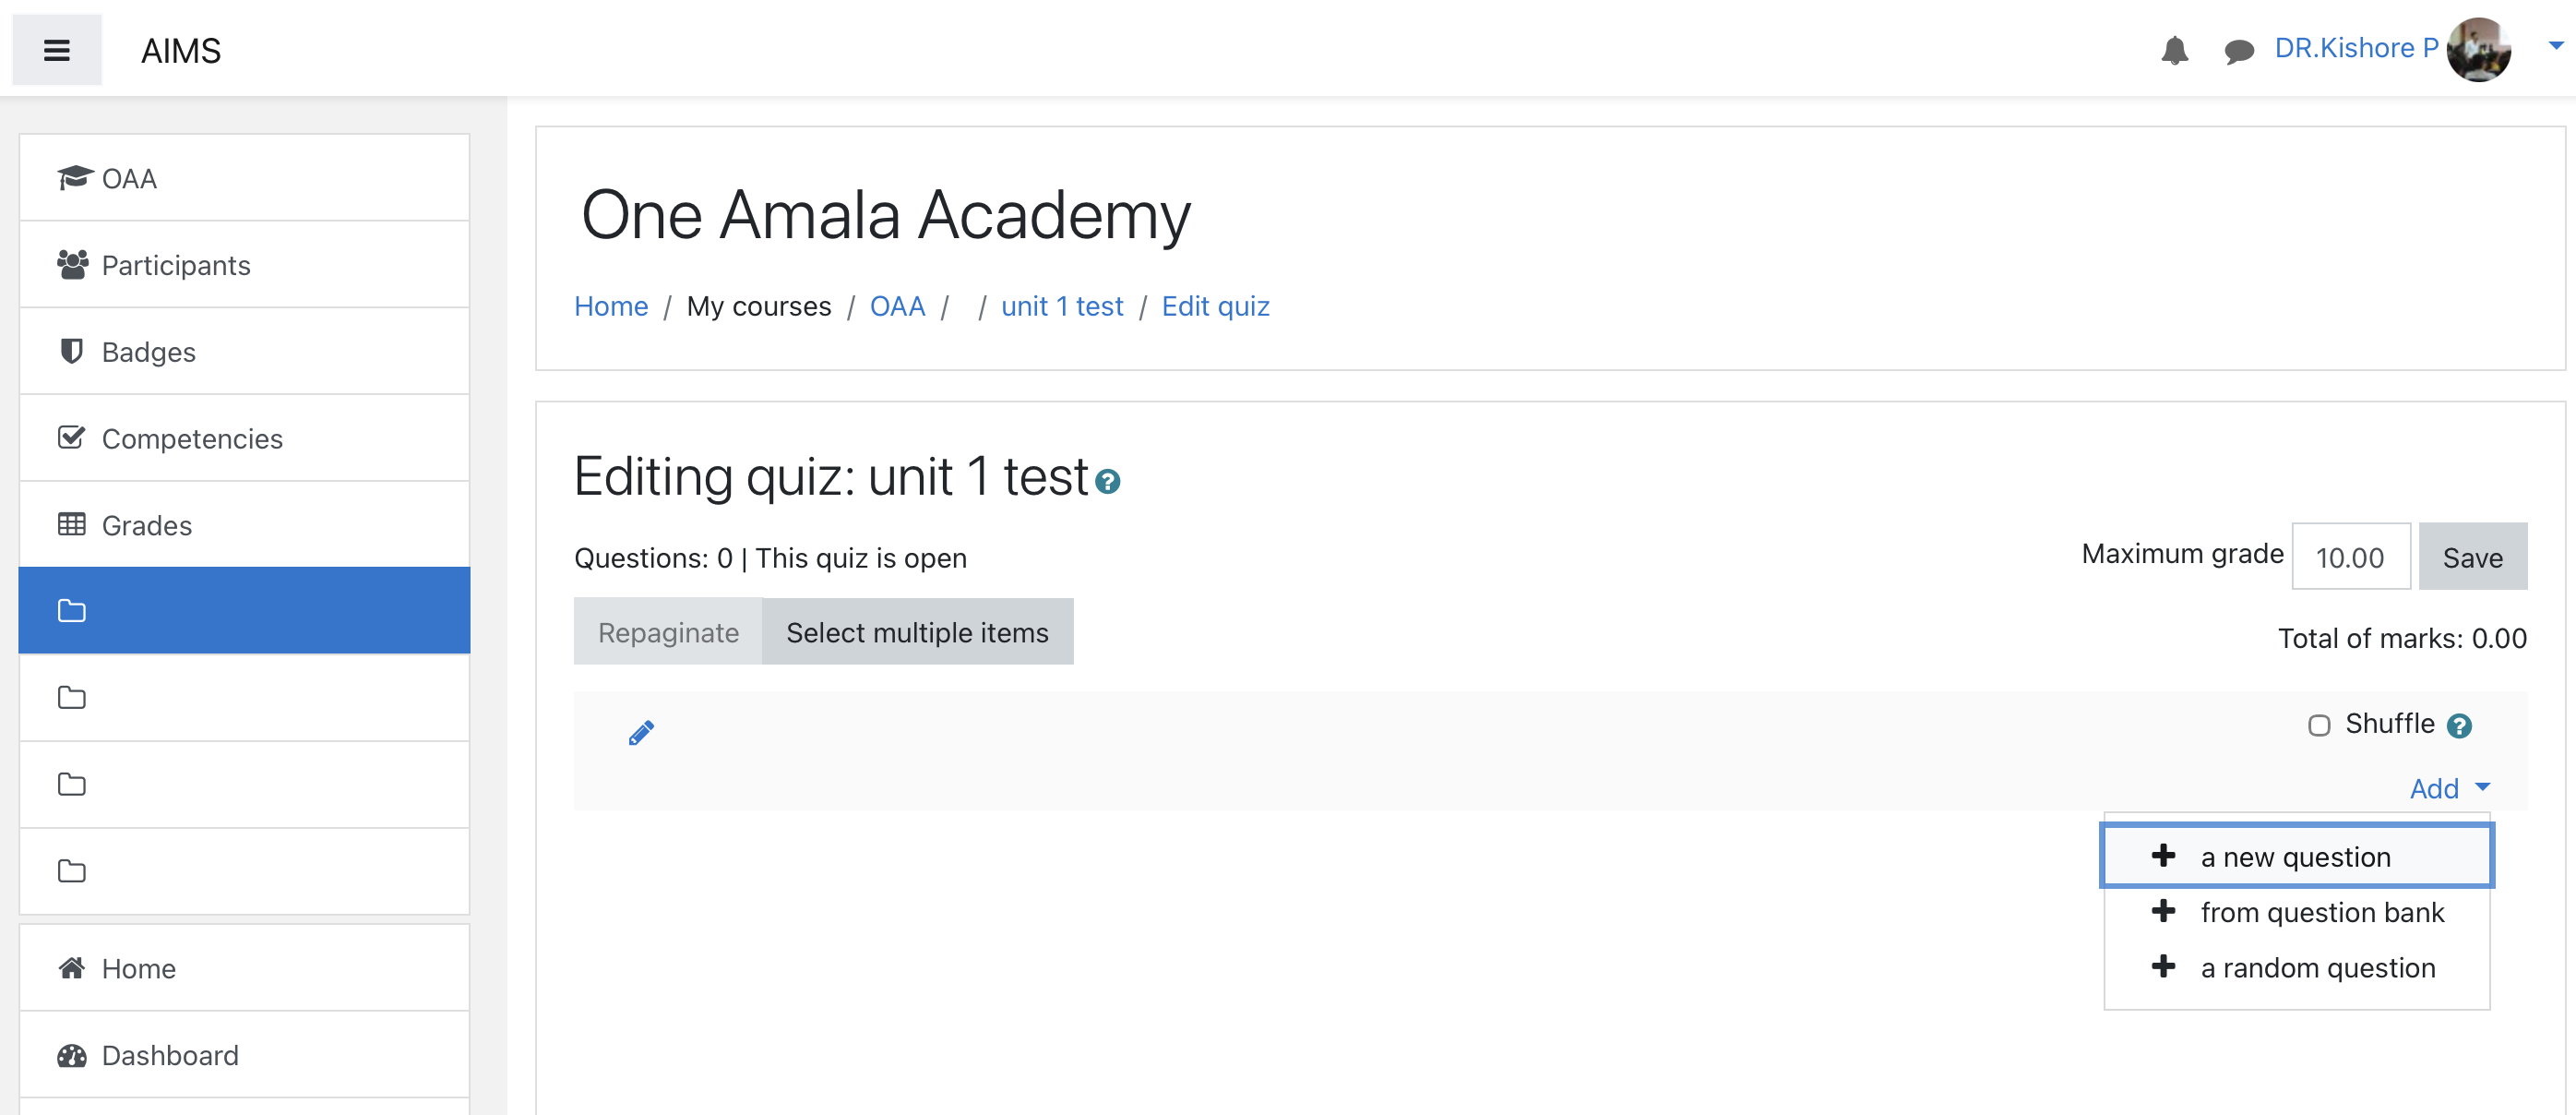
Question bank usage
If we already have a question bank uploaded to the course, there are two ways to add questions to a quiz:
Add from the question bank
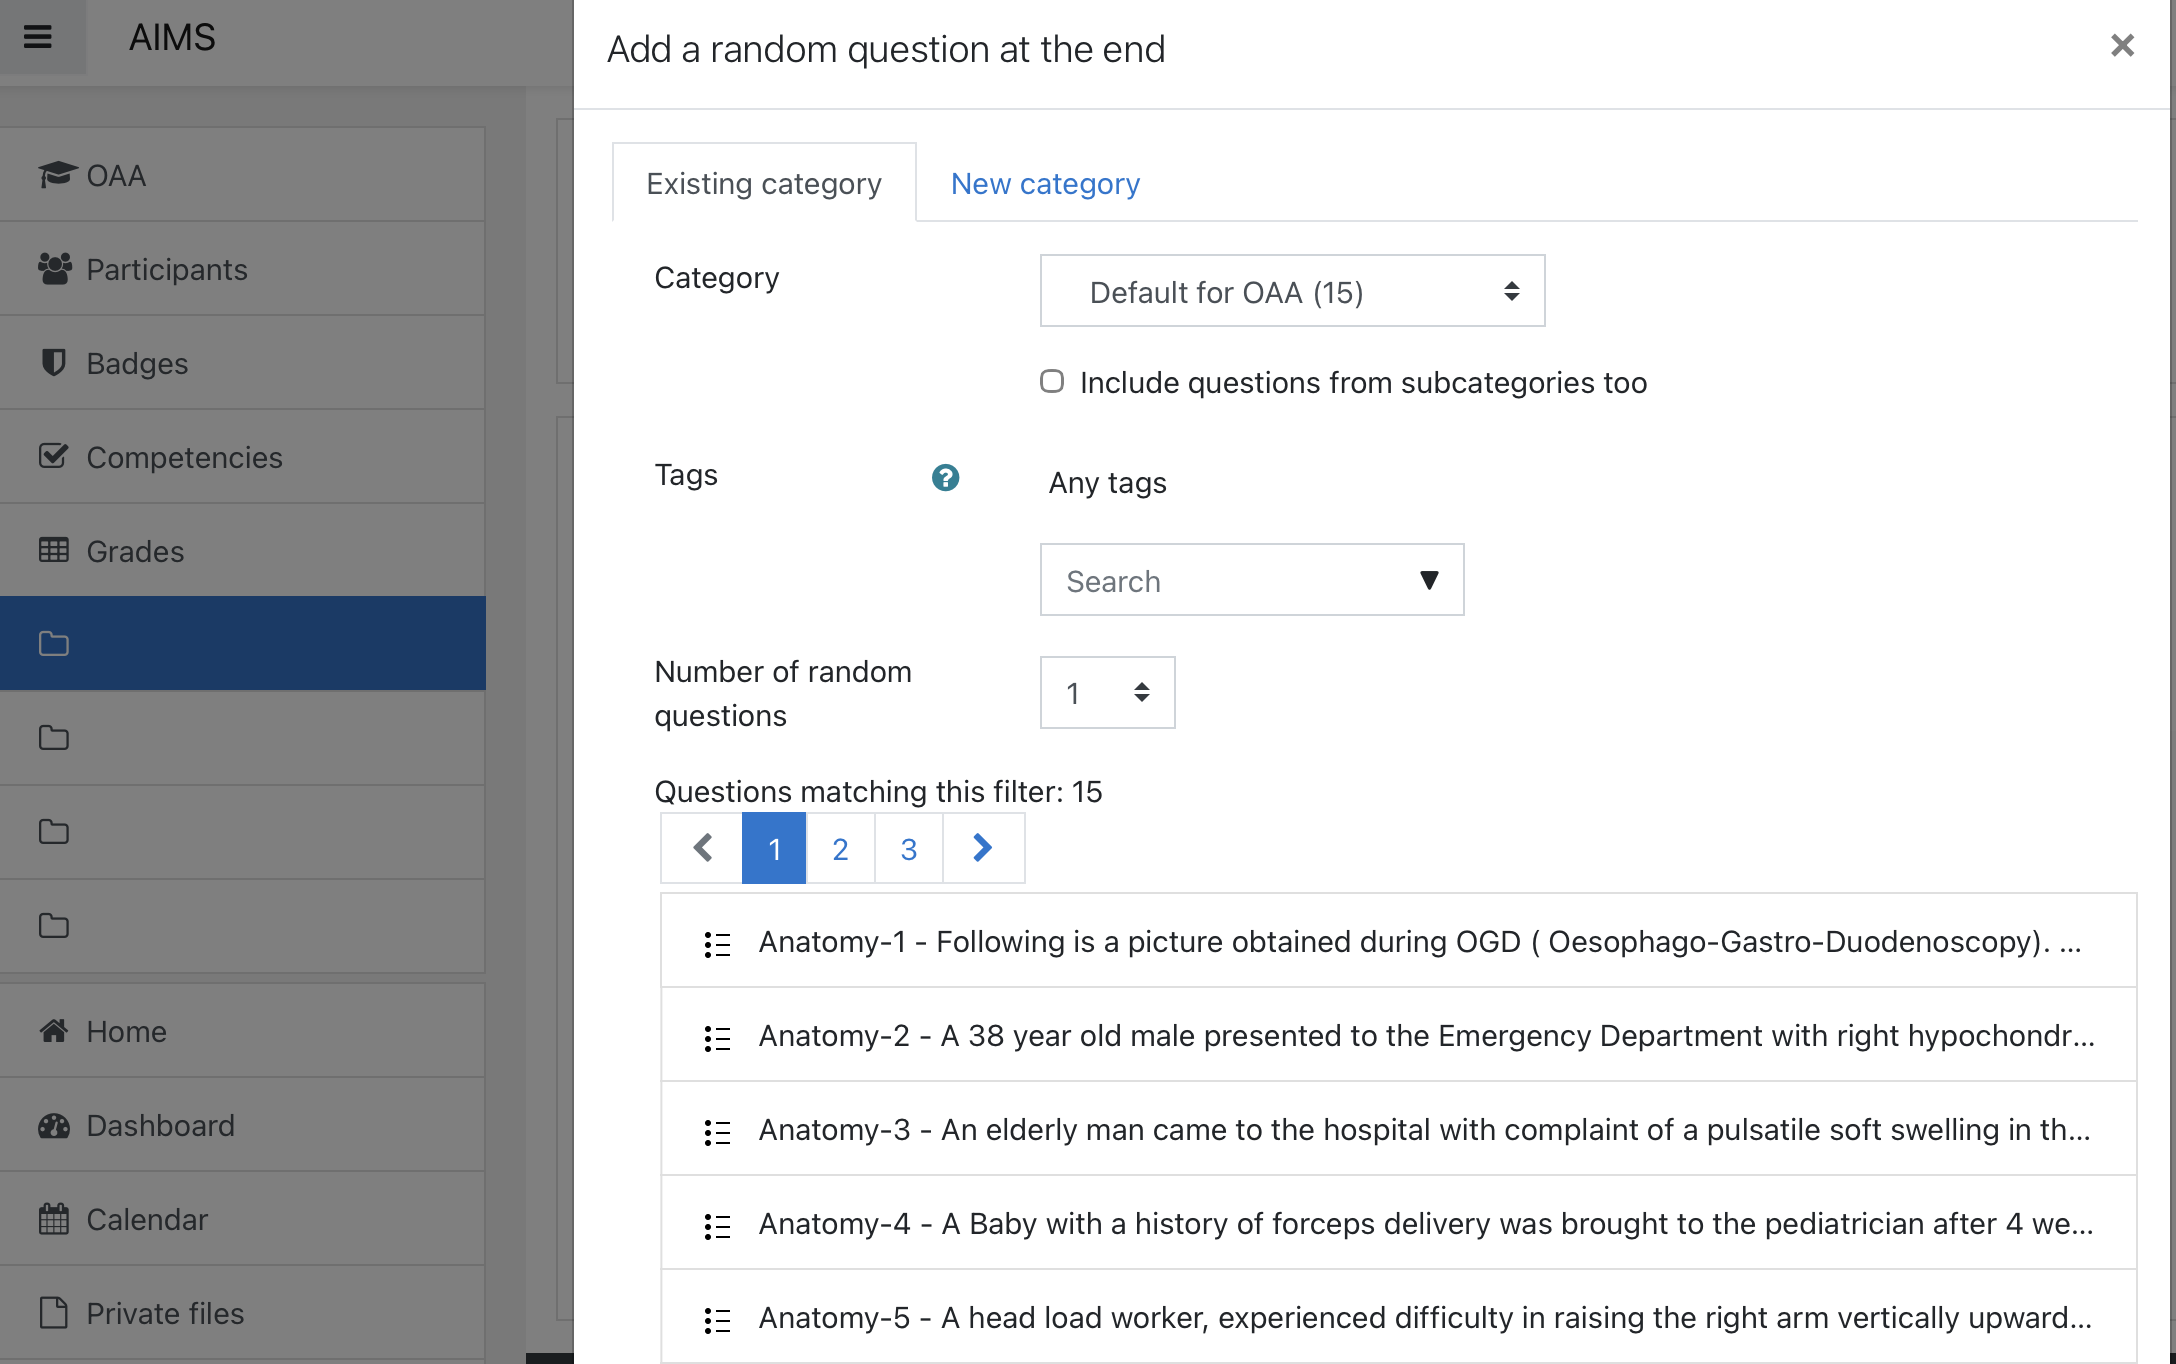
Add a random question
In the first option, we have to manually select the questions. If we choose the “Add a random question” option, we only need to enter the number of questions required for the quiz, and Moodle will select them randomly.
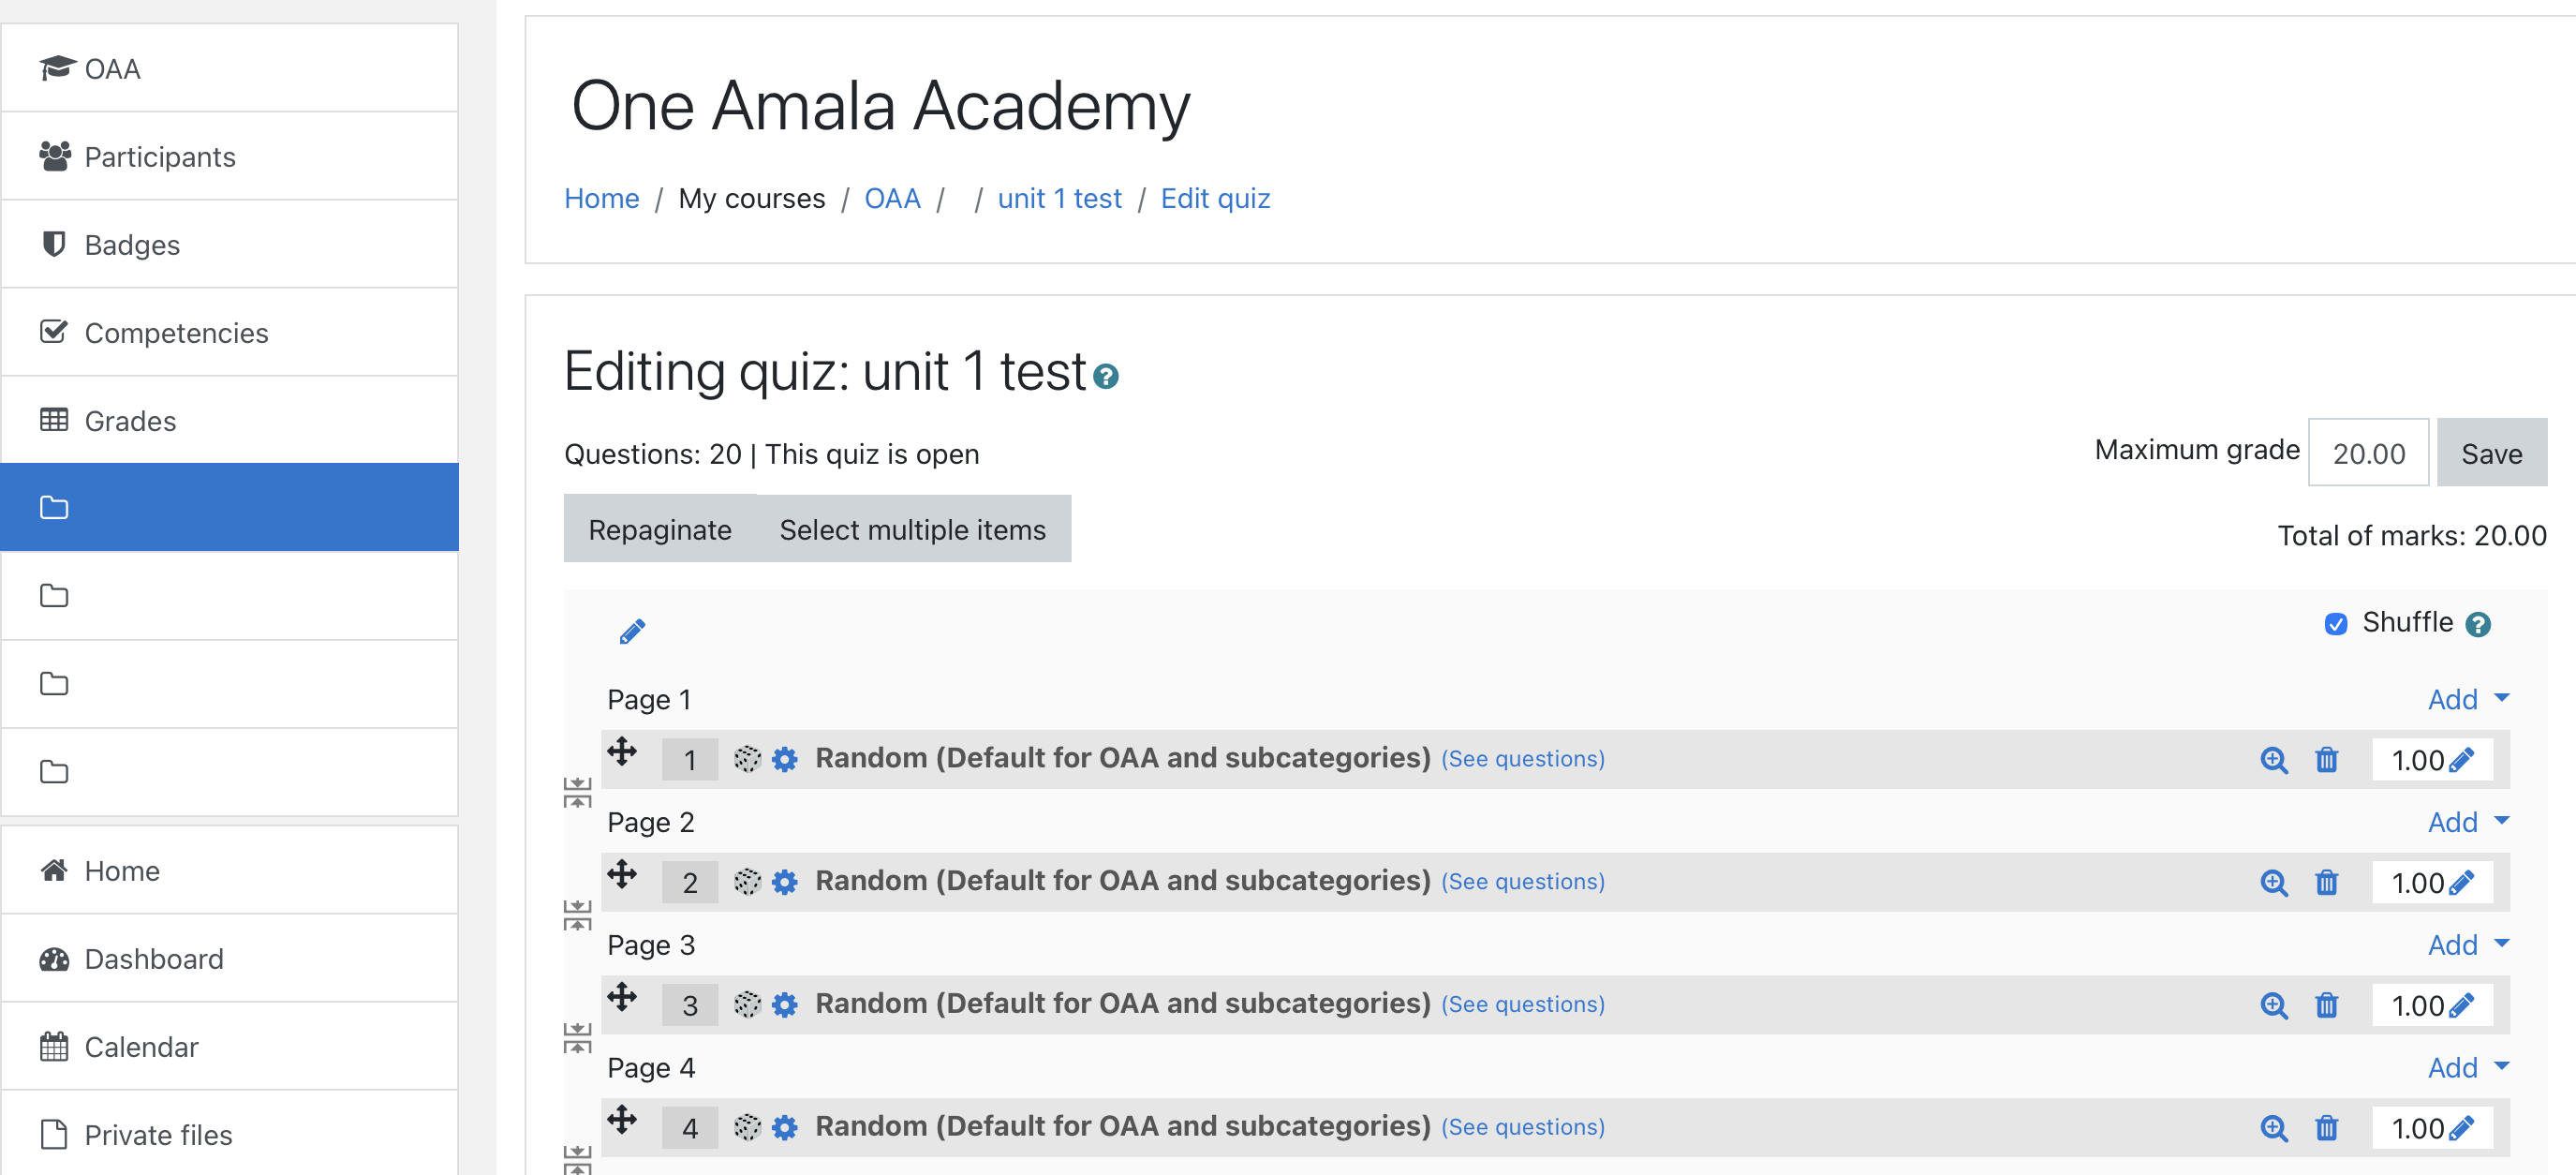
Step 5: Organize and Save
How to save
Adjust the marks per question if needed.
Adjust maximum marks.
Enable shuffle if needed.
Add section headings if you want to group questions.
Click Save when done.
Step 6: Preview and Test
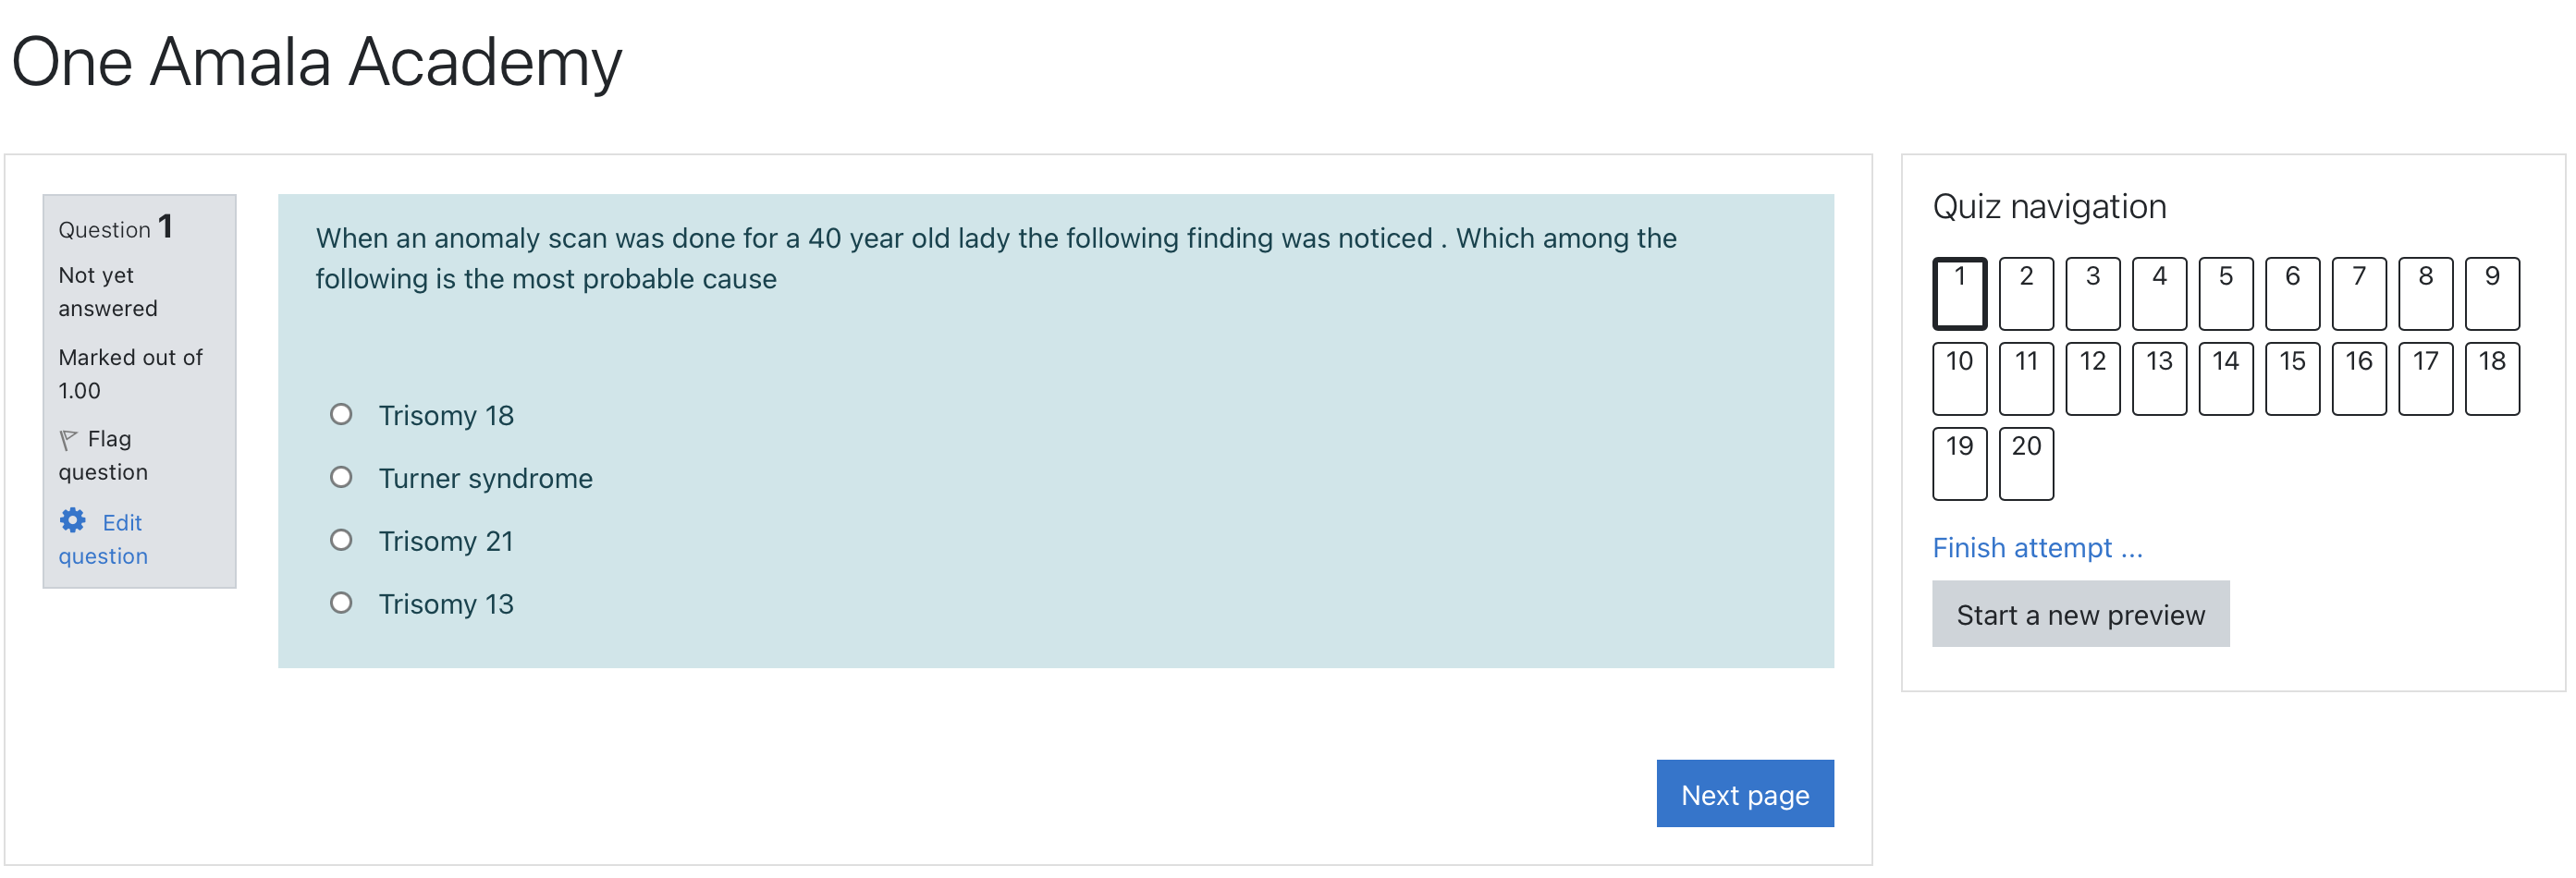
Click “Preview” to try your quiz as a student.
Check timing, layout, and navigation.